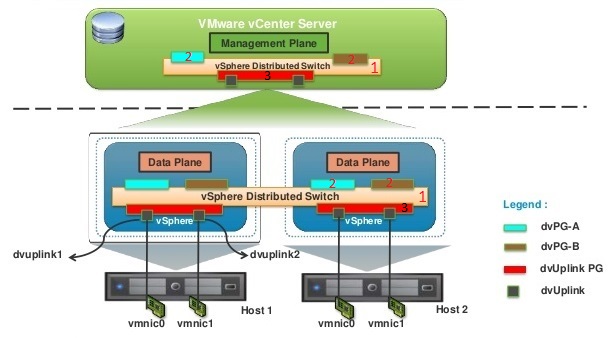
The technology VMware vSphere Distributed Switch (VDS / DSwitch) provides a centralized interface for configuring, monitoring and administering access switching to virtual machines across a vCenter.
It is no longer necessary to create switches on all ESXi, since the creation of a Distributed Switch on the vCenter makes it possible to publish its configuration on all ESXi managed by it.
So, If this is your first vDSwitch, you need to follow 3 steps:
Procédure
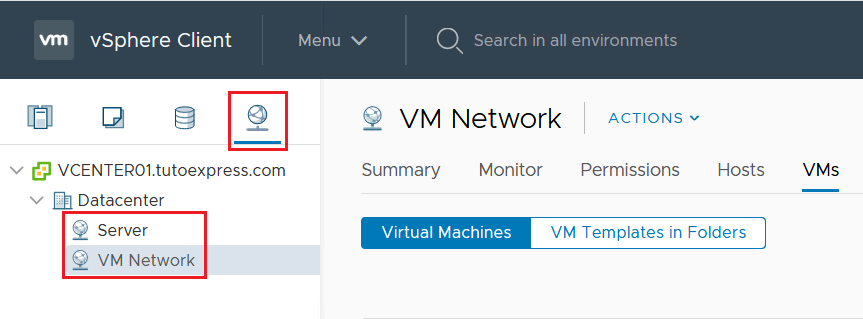
First, from your vSphere Web Client console, go to vCenter Server and select the Network section. On the current infrastructure, you can see two local switches: Server and VM Network.
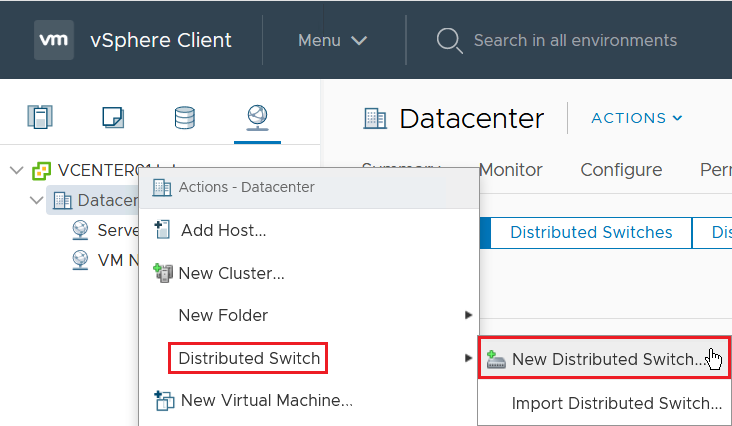
Then, to create a Distributed Switch, you need to right-click on your Datacenter, Distributed Switch and New Distributed Switch…
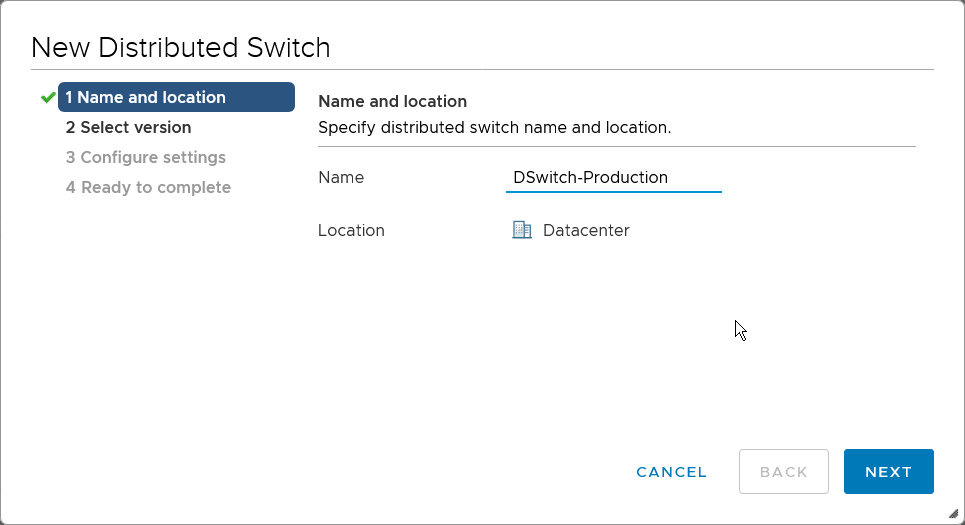
I recommend you to name your VDSwitch correctly in order to have a simplified management of your networks.
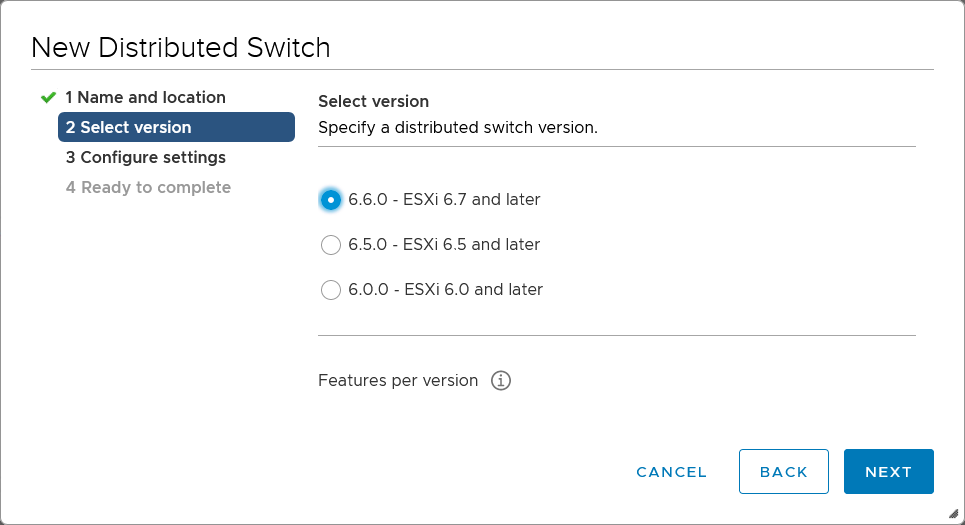
Then, choose the version you want to use based on the OS version of your oldest ESXi. A Distributed Switch in version 6.7 cannot be used by an ESXi 6 or 6.5. However, a Distributed Switch in version 6 can be used by ESXi 6, 6.5 and 6.7.
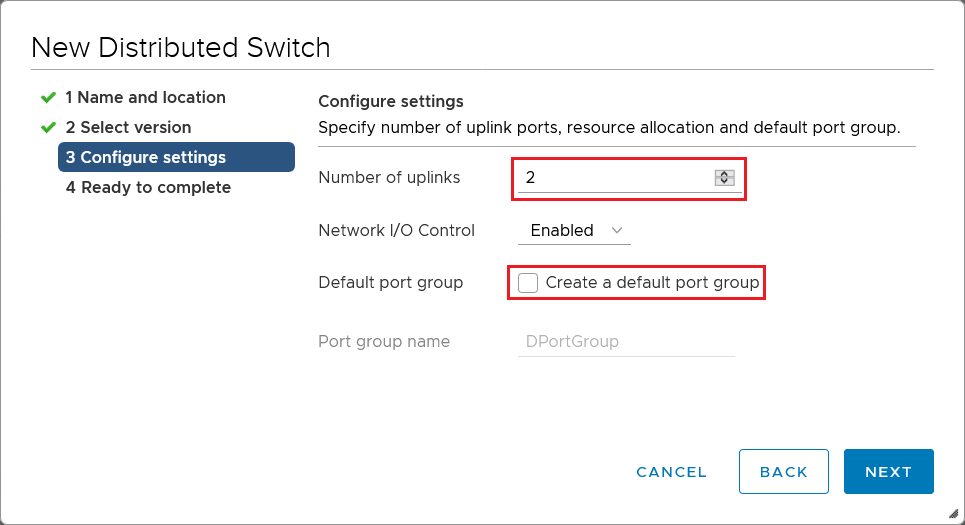
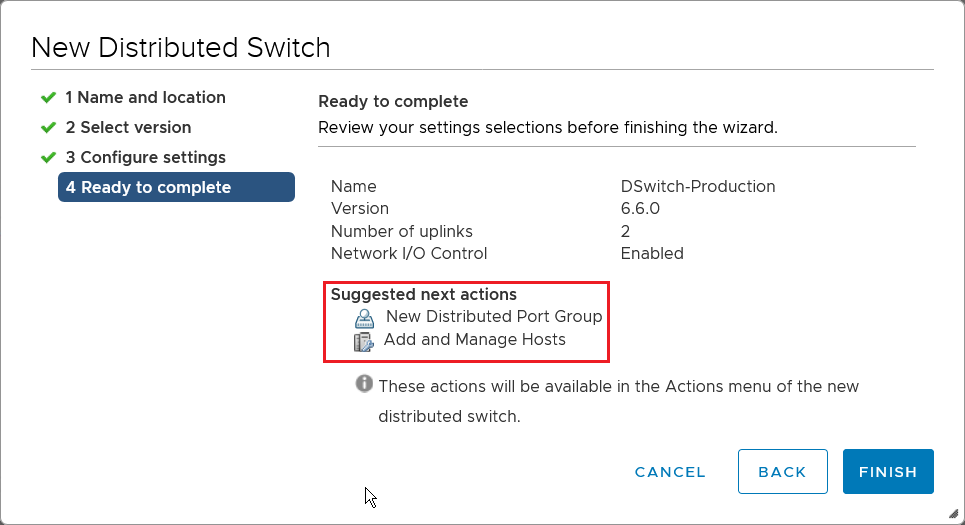
Then, in the next step, set the number of uplinks (vmnic) that will be added to the DSwitch. To ensure communication redundancy, I decide to assign two uplinks. Also, uncheck Create a default port group since we’ll do it ourselves later …
We notice that VMware suggests that we perform two additional steps after our manipulation. Follow the links to see the next steps:
- New Distributed Port Group: Create one or more port groups, depending on the networks to add
- Add and Manage Hosts: Add one or more hosts whose DSwitch configurations will be published.
If all settings are correct, validate the creation process.
Now in the Network part of your web console, the new VDSwitch appears
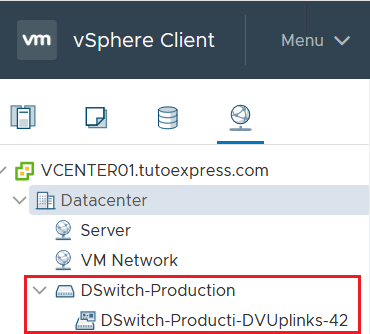
Finally, your VDSwitch is created. Continue with the following steps:
- Create a port group
- Add and manage hosts

