
Do you want to convert the disk format of your virtual machine ? Have you extended this by the VMware GUI that has been replaced by Lazy Zeroed Thick ?
Do not panic ! In this tutorial, we’ll see how to convert a Lazy Zeroed Thick disk to an Eager Zeroed Thick disk, and keeping all the data, with VMware vSphere 5.5.
But before, here is some information if you have extended your disk:
When you add disk space to your virtual machine by going directly through the VMware GUI, you do not have control over the options or the format of it, which is then on Lazy Zeroed Thick, even if your vmdk was initialized in Eager Zeroed Thick.
Extend Eager Zeroed Thick disk and keep its format, follow this link.
Prerequisite
- SSH access to your ESXi
- Retrieve the storage information of your virtual machine (LUN, Datastore, Disk number, controller, ESXi host)
- Activate the virtual machine on which you will perform the manipulation.
- Turn off the virtual machine.
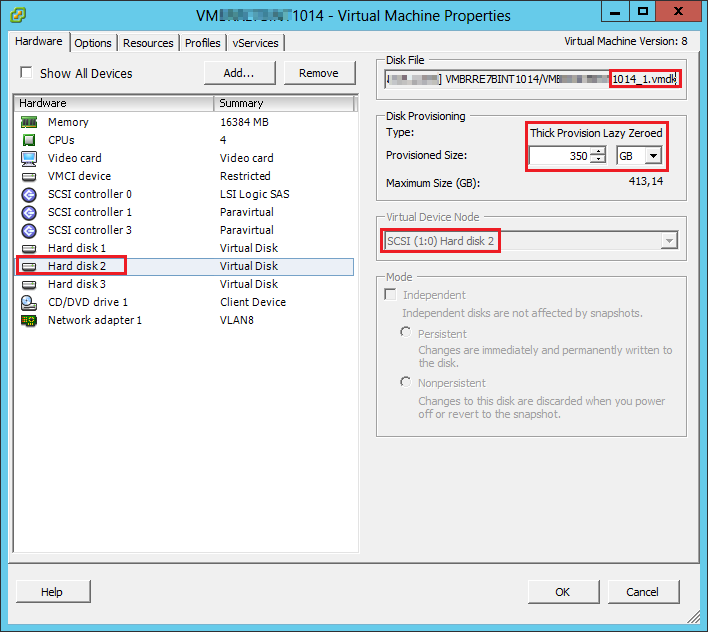
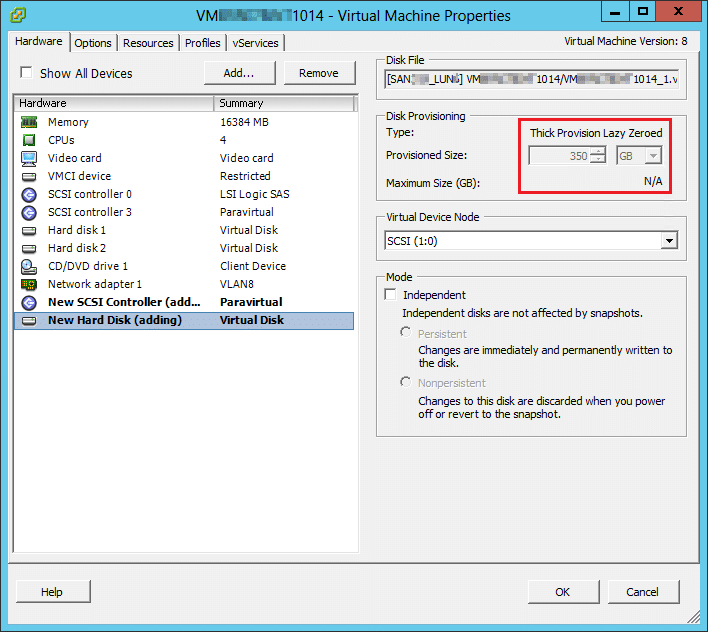
In this example, we use the VMxxxxxx1014_1.vmdk disk, with capable of 350 GB.
Procedure
Check the disk format. To get information about your disk, connect you on ESX that hosts your machine virtual in SSH.
vmkfstools -D "/vmfs/volumes/My_volume/Ma_VM/My_Disc-flat.vmdk"
or
vmkfstools -D "/vmfs/volumes/My_volume/Ma_VM/My_Disks.vmdk"
(The difference between the two commands is that one is done on the .vmdk and not on the -float.vmdk)
You can also move around the tree with the cd command before executing the command.
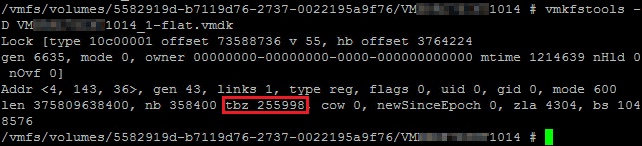
If the value of tbz is different from 0, the disk is not in Eager Zeroed Thick.
To convert your disk, use this command, taking care to pass it on the correct .vmdk. This one was identified at the beginning of the procedure.
vmkfstools -k "My_Disk.vmdk
![]()
The treatment may be longer or shorter depending on the volume of your disc.
When the operation is complete, you can restart the command vmkfstools -D “My_Disk.vmdk” to find that the value of the tbz is 0. If so, your disk is in Eager Zeroed Thick.

Reassign the disk to your VM
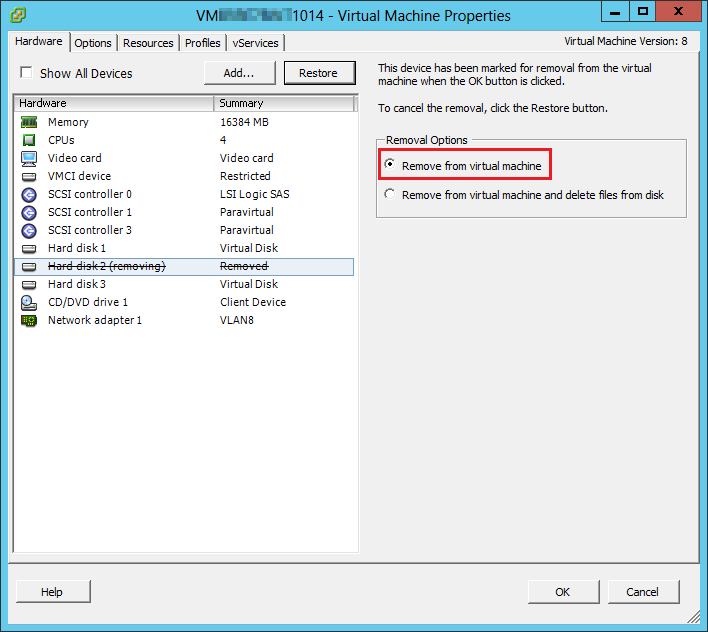
For changes to take effect, connect you on vSphere Client. You must detach the disk from the VM for reassigning. Select it and click Remove.
Then, very important when deleting, choose Remove from virtual machine. This will not delete the data.
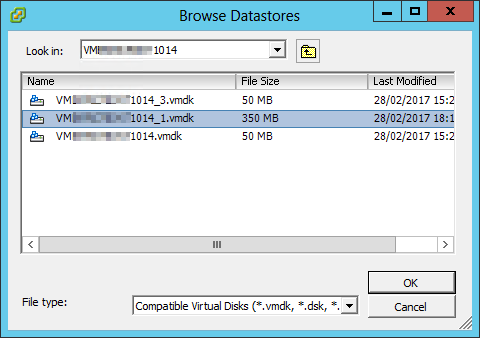
We will now reassign the deleted disk.
Add a new disk and select Use an existing virtual disk. Indicate the path to reach it and validate.
Fill in the information identified at the beginning of the procedure (controller etc …)
When the step is complete, the drive still appears in Lazy Zeroed Thick in your machine’s settings. This is perfectly normal.
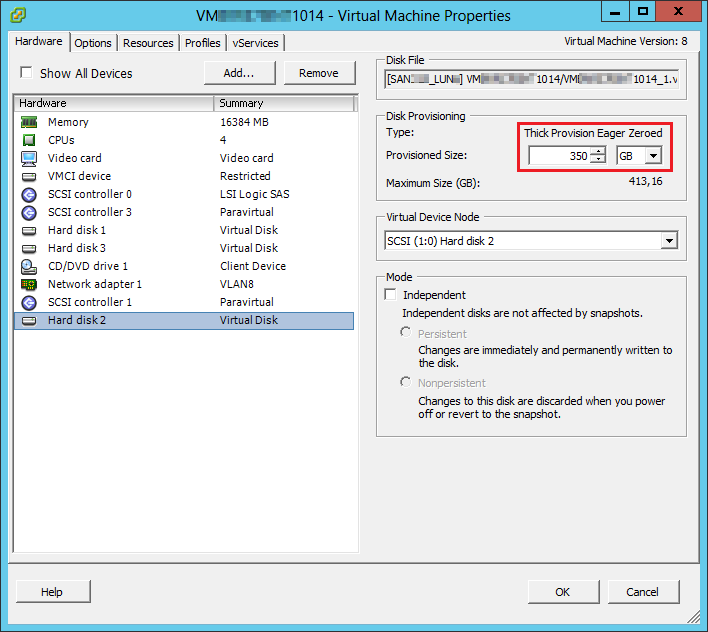
Close the configuration window of your machine and reopen it.
The configuration appears correctly
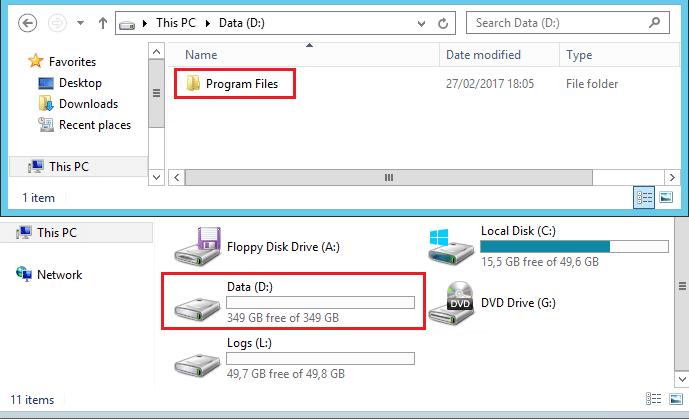
Turn on your machine and see that your data is still there.
At the end of this procedure, do not forget to disable the SSH access of your ESXi


