We will see together, how to change the size of a VMWare Eager Zeroed Thick disk while keeping this format.
Indeed, when you want to extend the partition of a disk and you change the size of this disk directly from the vSphere console, the format of this one does not keep the type “Eager Zeroed Thick”, but is modified in “Lazy Zeroed “
If you want to keep the Eager Zeroed format, you will need to use the appropriate commands, with VMware 5.5
Some reminders about the different types of disks offered by VMware:
- Eager Zeroed : Static provisioning immediately set to zero, uses the entire space allocated when creating the disk and initializes all blocks to zero. (The most powerful of the three).
- Lazy Zeroed : Static Provisioning Offline, uses all of the space allocated when creating the disk but does not initialize all blocks to zero. (Intermediate performance).
- Thin Provisionning : Allows to consume only the useful place and thus to evolve the size of the disk according to the needs (The least powerful of the three).
The choice of the type of disk is obviously different according to each situation. For example, if you are installating a low I/O application, you can use a type “Thin Provisionning”. If you deploy a SQL server on your server (very I/O consuming application), then it would be better to configure a disk type “Eager Zeroed”.
Prerequisites
Some prerequisites for the operation to proceed correctly
- Have SSH access to ESXi
- Retrieve the information where your VM is currently stored (LUN / Datastore / etc ..)
- Turn off the VM on which you go to do the action
Procedure
Checking the disk format
To get information about your drive, enter the following command:
vmkfstools -D /vmfs/volumes/Your_volume/Your_VM/Your_VM.vmdk
If the tbz value is equal to 0, the disk is in Eager Zeroed.

Extend the disk
To extend your disk, use the following command:
vmkfstools -X valueG -d eagerzeroedthick /vmfs/volumes/Your_volume/Your_VM/Your_VM.vmdk
This is done on the .vmdk and not on the -flat.vmdk. It will extend the disk Your_VM.vmdk which will total the value indicated in the order in Eager Zeroed format.
Example : If your disk is 50GB and you want to add 50 more (a total of 100GB), you will use vmkfstools -X 100G -d eagerzeroedthick /vmfs/volumes/Your_volume/Your_VM/Your_VM.vmdk

Once completed and to verify that the disk is properly extended, use the vmkfstools -D /vmfs/volumes/Your_volume/Your_VM/Your_VM.vmdk command.
Reassigning the disk
Now, go back to VMware vSphere Client.
You can see that the values have remained the same as before your manipulation. It’s normal.
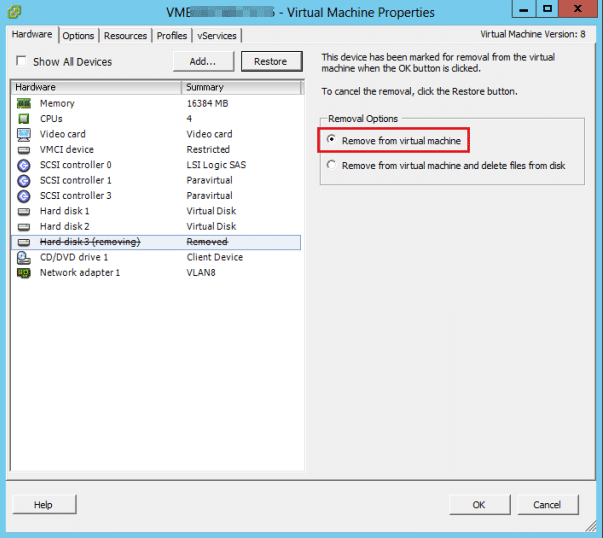
Detach the affected disk from your VM, by using the Remove button by selecting Remove from virtual machine carefully. This will not delete the data.

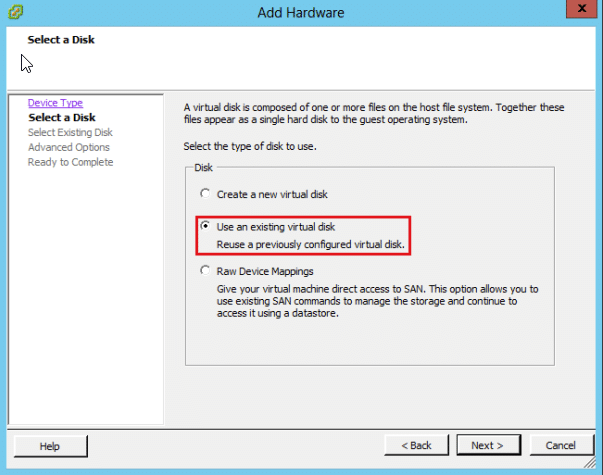
Then, add a new disk to your VM using the Add … button.
When selecting this, spedify Use an existing virtual disk

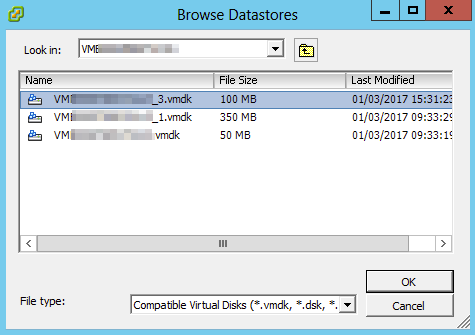
Browse the path to reach your disk and select it. We can already see that the size of it is up to date.

If your disk appears in Lazy Zeroed it’s normal.
Close the properties and open them again. Your disk now has the appropriate size and extension.
Extend the Windows volume
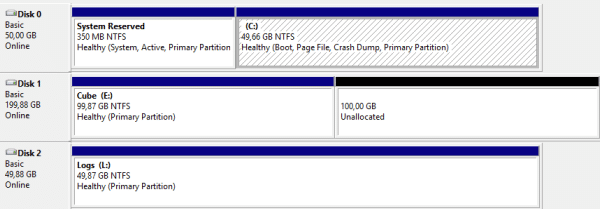
Go to Computer Management at your server. The extra space is available, all you have to do is extend the volume.

Finally, you cas see that your data has remained intact.


