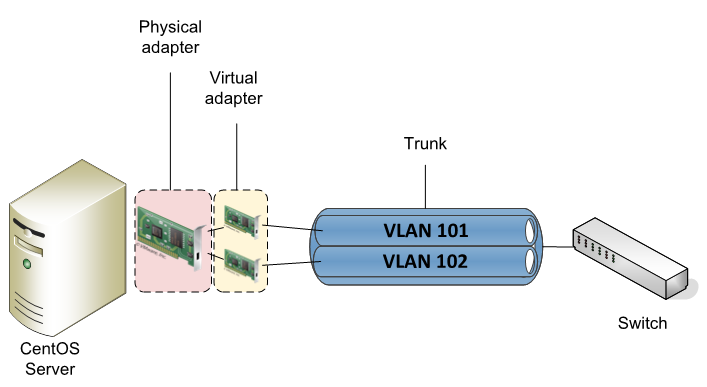
In this tutorial, we will create virtual sub-interfaces from a single « root » physical interface. Each of these sub-interfaces can be associated to a separate VLAN using the 802.1q module.
In my case, the CentOS server had to obtain several IP addresses from a single physical card, depending on the number of VLANs.
Then, after interconnecting the physical adapter of the server to a trunk port of a switch, I was able to create virtual sub-interfaces on the server for each VLAN of the trunk. This allowed me to assign each sub-interface to a dedicated VLAN and ensure direct communication between my servers and multiple networks.
More information on the environment :
- Using a Linux CentOS 7.5 distribution
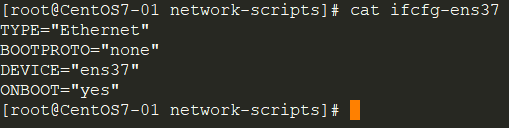
- A “root” physical interface ens37: ifcfg-ens37 file
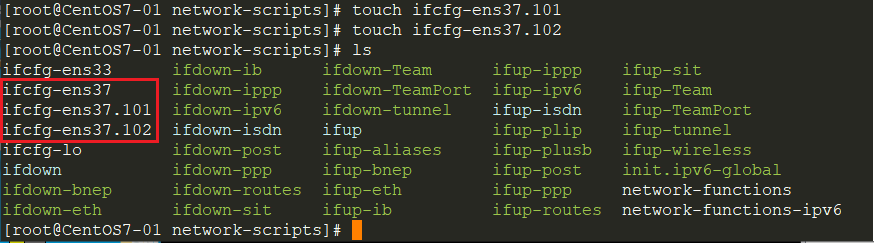
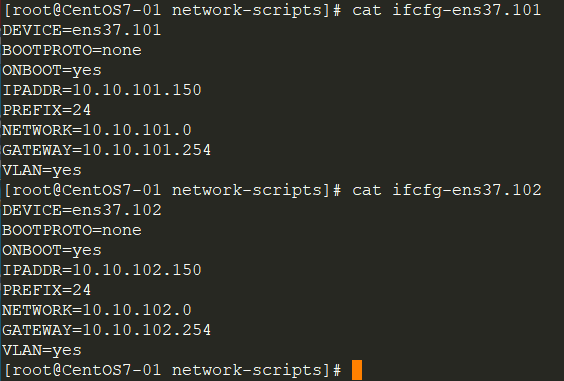
- A virtual Sub-interface ens37.101: ifcfg-ens37.101 file integrated in VLAN 101
- A virtual sub-interface ens37.102: ifcfg-ens37.102 file integrated in VLAN 102
Procédure
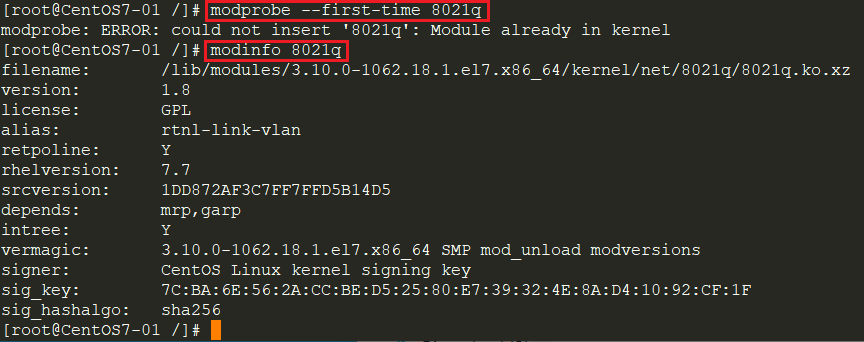
On some versions of CentOS, the 802.1q module is loaded by default. You can ensure that the module is loaded with the command :
modprobe –first-time 8021q
In order to view information about the module, you must use this command:
modinfo 8021q
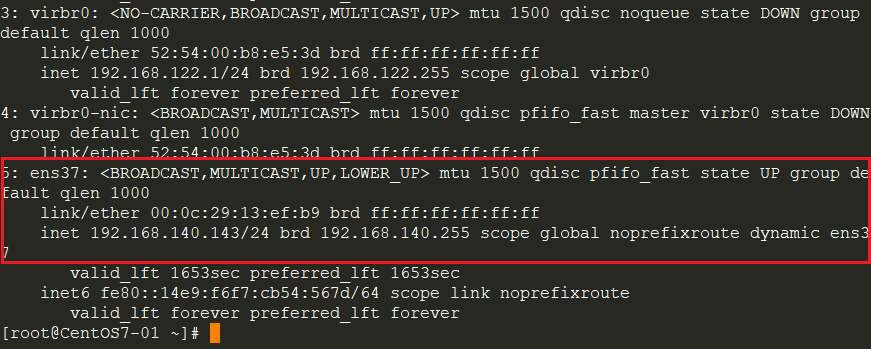
To perform this procedure, I added a new network card to my CentOS server. Use the ip a command to find out which network interface has been added. In my case, it is ens37.
Configure the 802.1q TAG VLAN using the ifcfg files
First, go to /etc/sysconfig/network-scripts/ and display the files with the ls command
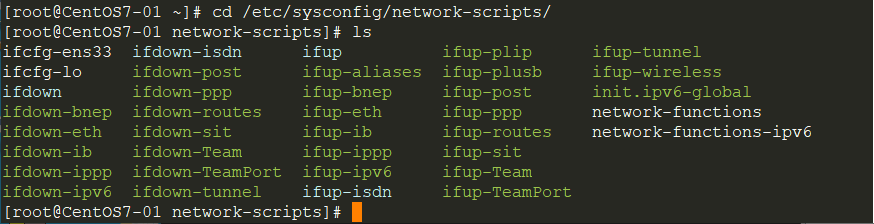
The ifcfg file for the ens37 interface does not exist, so we will create it. Use the touch command to create a file and vi to edit it.
![]()
To create sub-interfaces of a root interface, the contents of the ifcfg-ens37 root file only need the parameters TYPE, BOOTPROTO, DEVICE and ONBOOT
Then, you can create the configuration files for the virtual subinterfaces. Follow the ifcfg-ensRootInterface.IDSubInterface template
You must edit the created files with the information adapted to your needs:
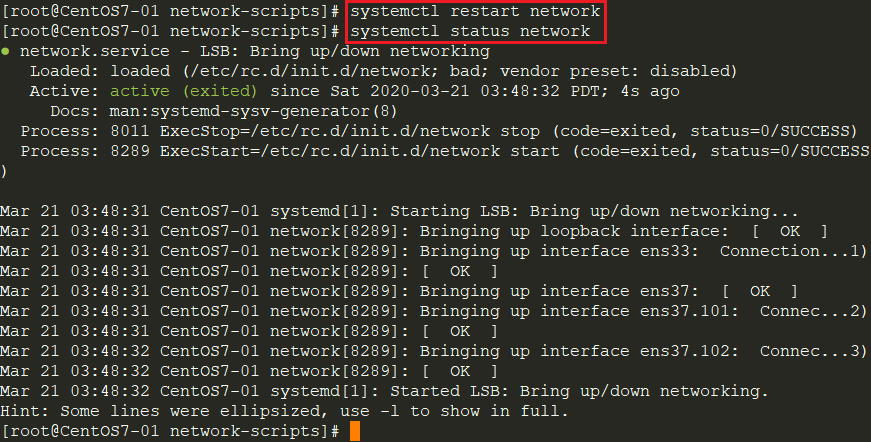
Then, restart the network service of your server
/ ! \ If an ifcfg file is created and this one is not set, the restart of the network service will fail.
Now your network sub-interfaces are configured as you set them up. Recall the ip a command to check the IP settings.

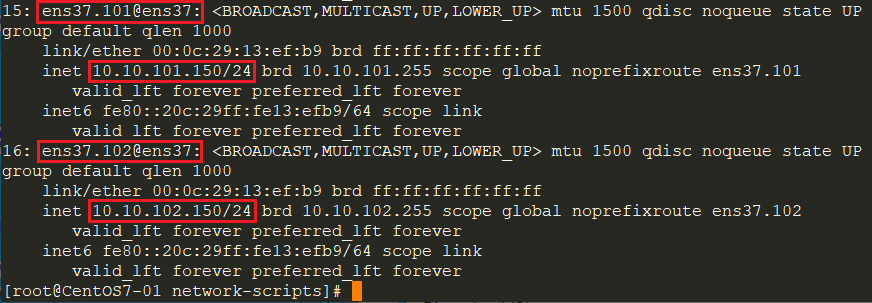
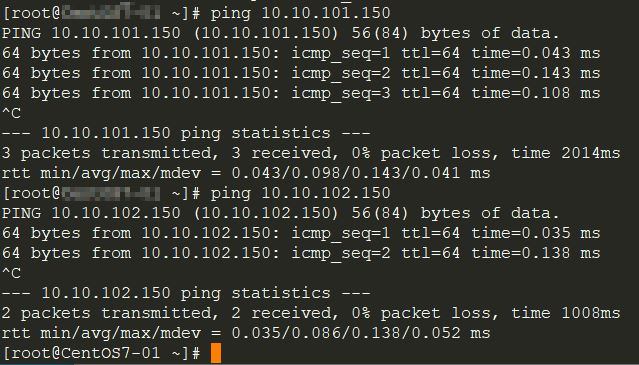
In my case, the configuration provided so far has made it possible to ensure communication between the machines in a VLAN and the associated sub-interface.
Configure the 802.1q TAG VLAN using IP commands
To associate the sub-interface ens37.xxx with a VLAN ID, use the command with root permissions :
ip link add link ensXX name ensXX.XXX type vlan id X
Then, to check the VLAN configuration of the interface, run the command
ip -d link show ensXX.XXX

To delete the VLAN ID of an interface, use this command
ip link delete ensXX.XXX

Finally, you can capture the frames reaching the physical device by doing the following
tcpdump -nnei eth0 –vvvv
![]()