
In this tutorial, we will install WordPress step by step, on a CentOS 7 Linux system.
This free tool is very popular for new websites, with simplicity of use and community.
Procedure
Prerequis
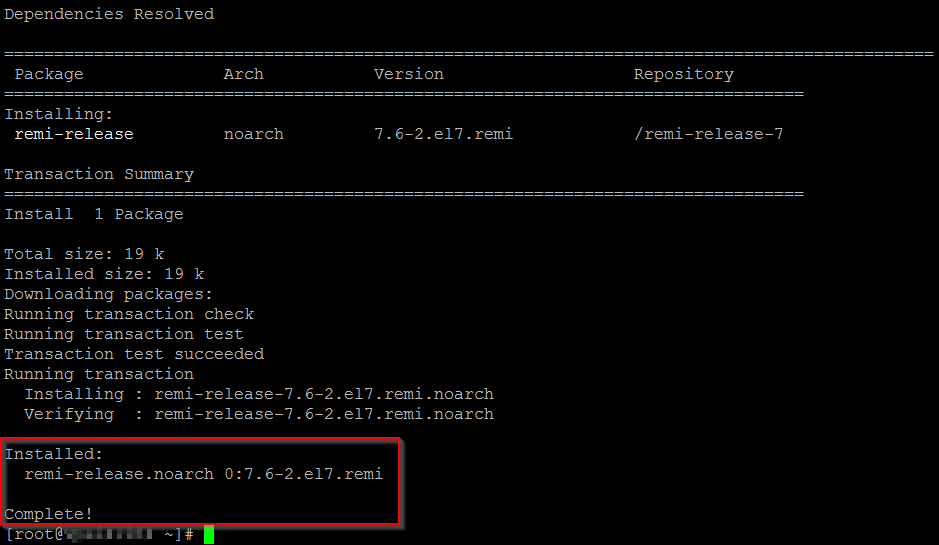
As a first step, install and activate the Remi repository :
yum -y install http://rpms.remirepo.net/enterprise/remi-release-7.rpm
we are going to use the php 7.3 version, disable the installation of php 5.4 using config-manager:
yum install epel-release yum-utils
yum install http://rpms.remirepo.net/enterprise/remi-release-7.rpm
yum-config-manager –enable remi-php72
Installing LAMP
For information, LAMP represents Linux Apache Mysql PHP
Run the following command to install LAMP :
yum install httpd mariadb mariadb-server php php-common php-mysql php-gd php-xml php-mbstring php-mcrypt
When the installation is complete, we will start and pre-configure MariaDB securely.
systemctl start mariadb
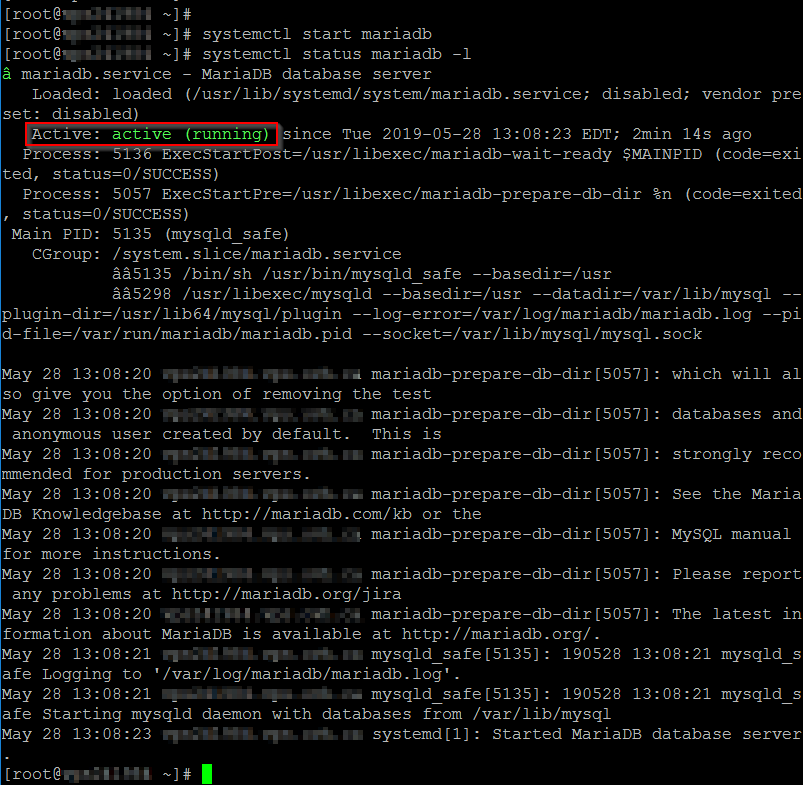
By default, there is no root password for MariaDB access. The secure installation will allow you to modify it, as well as other elements:
mysql_secure_installation
- Change the root password ? Yes
- Remove anonymous users ? Yes
- Disallow root login remotely ? Yes
- Remove test database and access to it ? Yes
- Reload privilege tables now ? Yes
Some practical information about MariaDB:
- /etc/my.cnf: main configuration file
- ~/.my.cnf: configuration file for the user
- /etc/my.cnf.d/: folder containing the configuration files
- /var/log/mariadb/mariadb.log: the server logs
- /var/lib/mysql/: folder containing the databases
Activate the MariaDb service when starting the machine
systemctl enable mariadb

Perform the same manipulation for the Apache service
systemctl start httpd
systemctl enable httpd

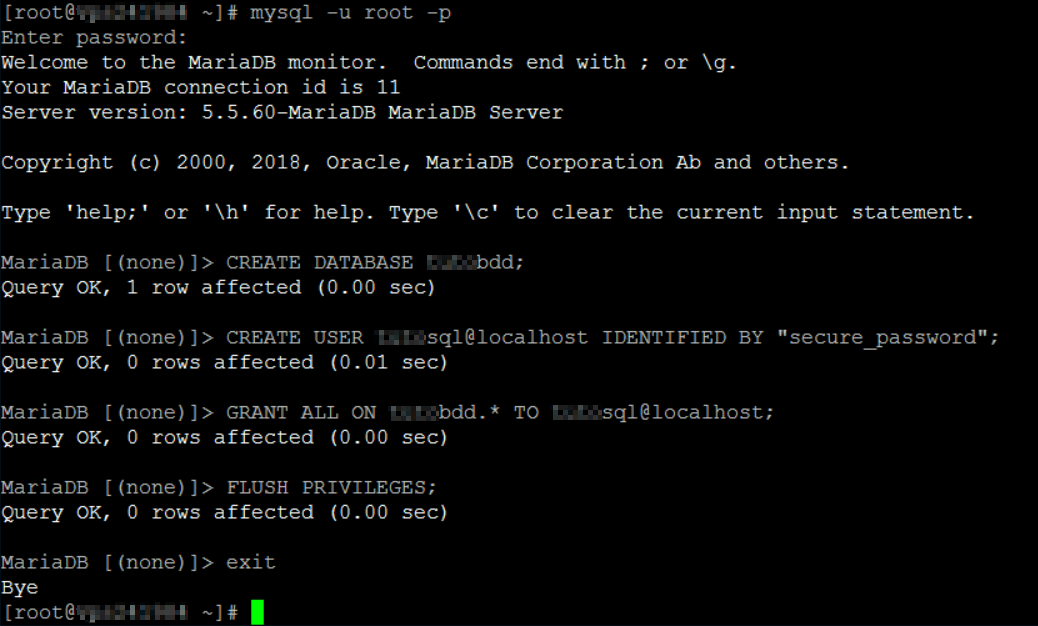
Now, we will create a database. Then, a user who will have the permissions on this database. This information will be used for WordPress.
# mysql -u root -p
Enter password:
## Create database ##
CREATE DATABASE ****bdd;
## Creating new user ##
CREATE USER ****sql@localhost IDENTIFIED BY “secure_password”;
## Grant privileges to database ##
GRANT ALL ON ****bdd.* TO ****sql@localhost;
## FLUSH privileges ##
FLUSH PRIVILEGES;
Create a password for the new user :
MariaDB [mysql]> SET PASSWORD FOR ‘****sql’@’localhost’ = PASSWORD(‘Your_Password’);
Query OK, 0 rows affected (0.00 sec)
## Exit ##
exit
Prepare the installation of WordPress
Go to the /tmp folder of your server and download WordPress
cd /tmp && curl -O https://wordpress.org/latest.tar.gz

You must extract the archive into your web directory
tar -xvzf latest.tar.gz -C /var/www/html
You will get the WordPress directory, containing the following files:

Now, change the owner of the WordPress directory to “apache”
chown -R apache:apache /var/www/html/wordpress
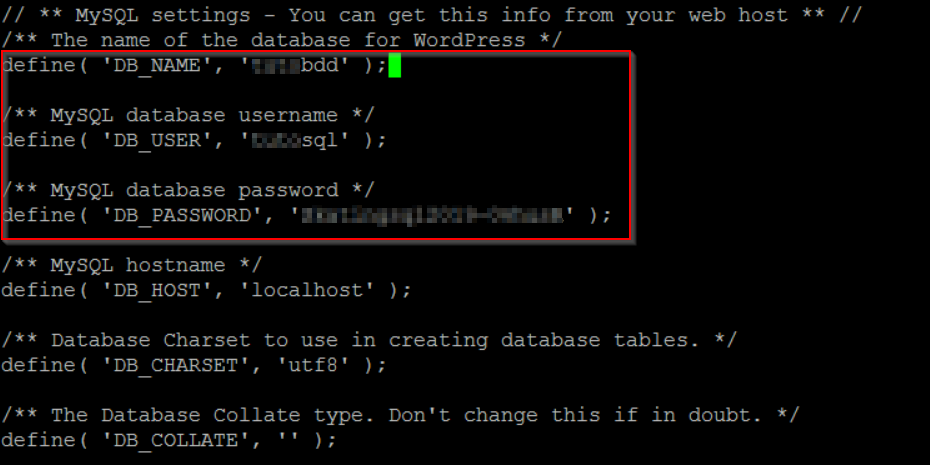
Then, make a copy of the wp-config-sample.php file by wp-config.php and edit it. It is with this file that we will establish the connection between WordPress and the database created on MariaDB.
cp -a wp-config-sample.php wp-config.php
Then, fill in the information about your new previously created database:
Database name : **** bdd
Username of the database : **** sql
User password : ****
vi wp-config.php
Then, modify some lines of the httpd.conf configuration file
vi /etc/httpd/conf/httpd.conf
DocumentRoot “/var/www/html/wordpress”
Finally, from a web browser, fill in the IP address of your server and start the installation of your site
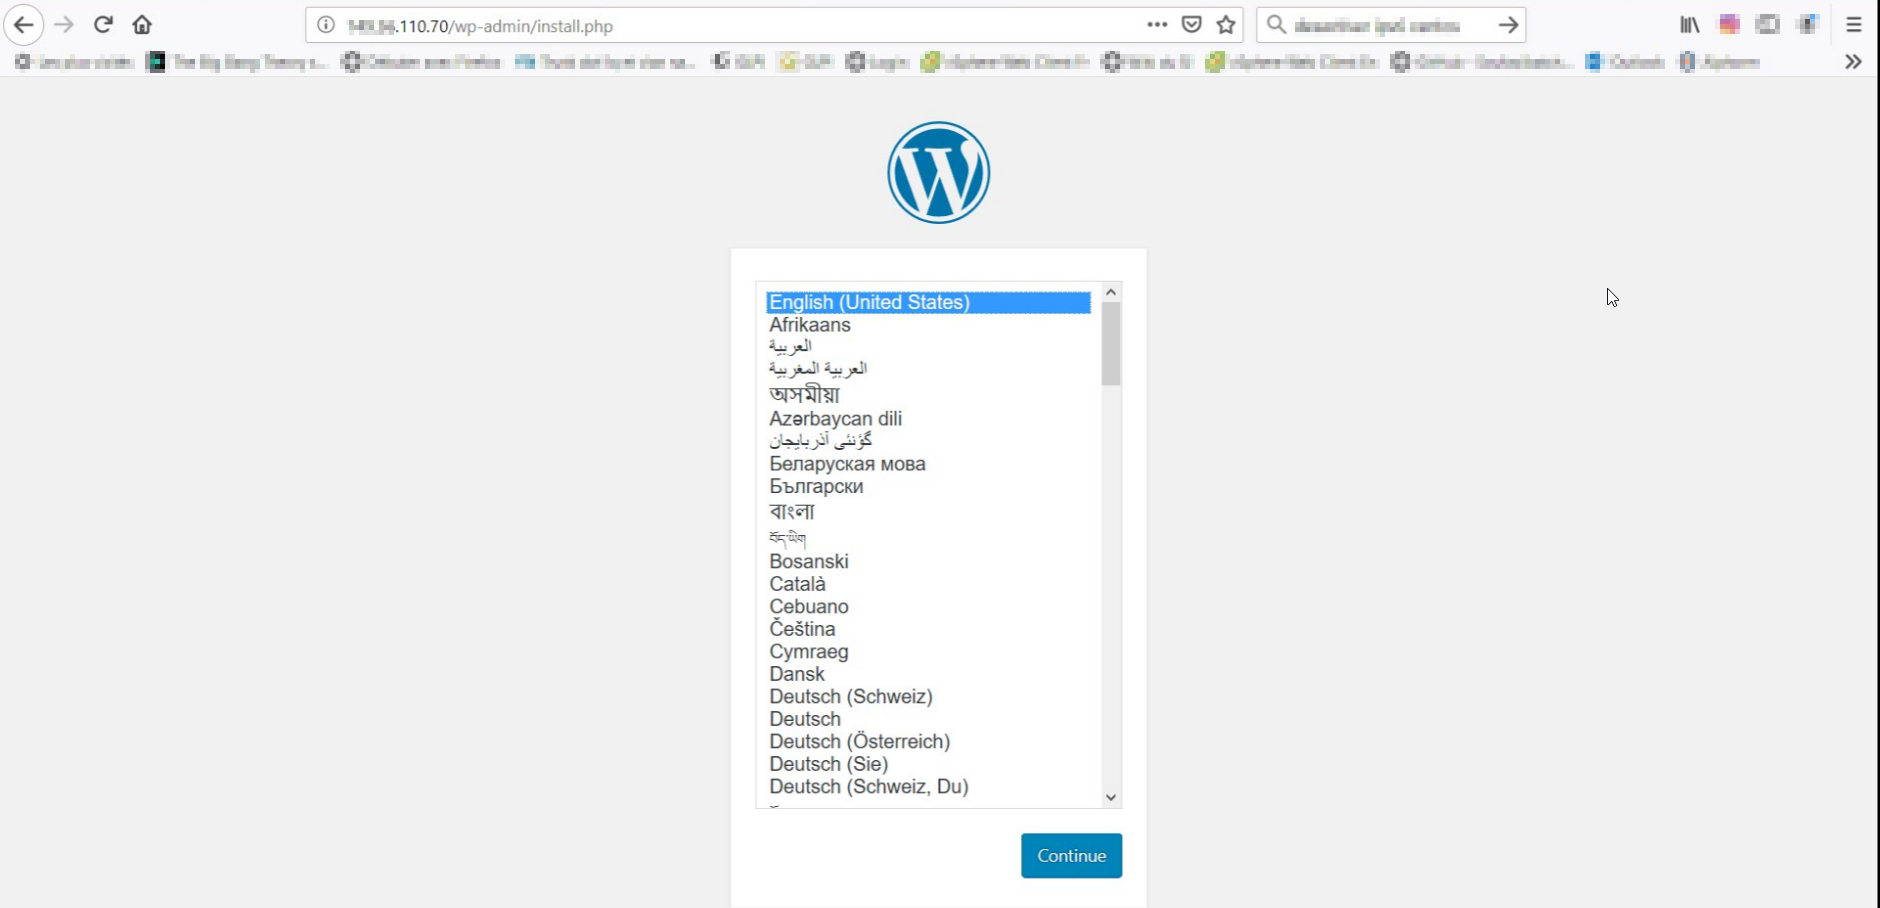
Your installation is complete. You can now configure your WordPress site.
Official web site : https://fr.wordpress.com/


