In this tutorial, we are going to install SQL Server 2014 Enterprise, on a Windows Server 2016 machine. This procedure is a part of a set of procedure, to achieve a Windows Server Failover Cluster and SQLAlwaysOn (3/4).
Microsoft SQLServer is a database management system that uses the SQL language.
Procédure
/ ! \ If you want to do SQLAlwaysOn, this configuration must be the same on all servers. Otherwise, simply follow the steps below.
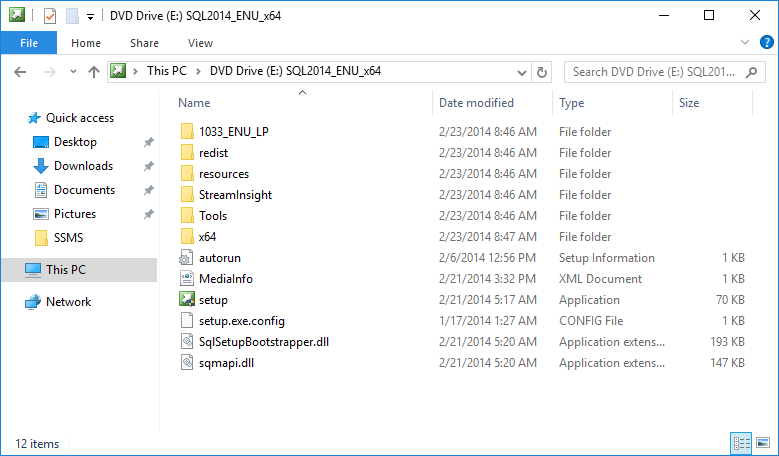
When you have the installation ISO file, run setup.exe
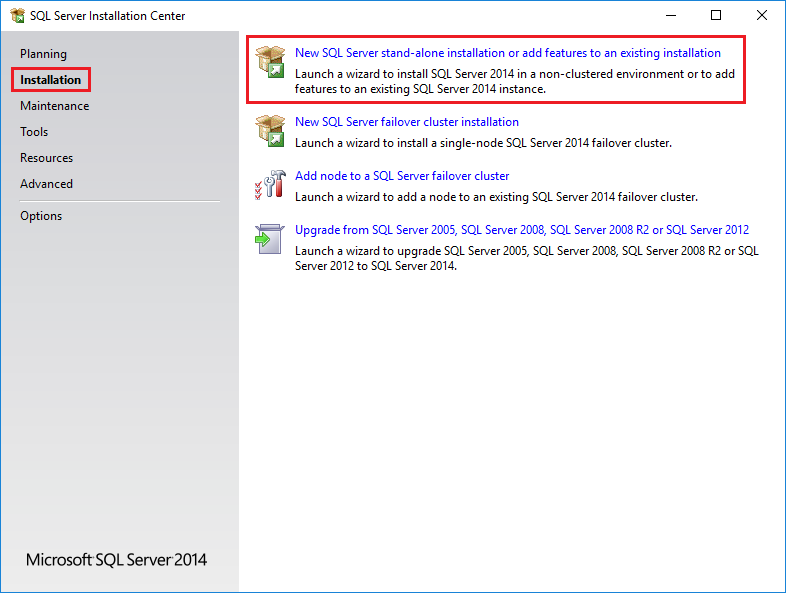
When SQL Server Installation Center opens, click Installation and launch New SQL Server stand-alone-installation or add features to an existing installation.
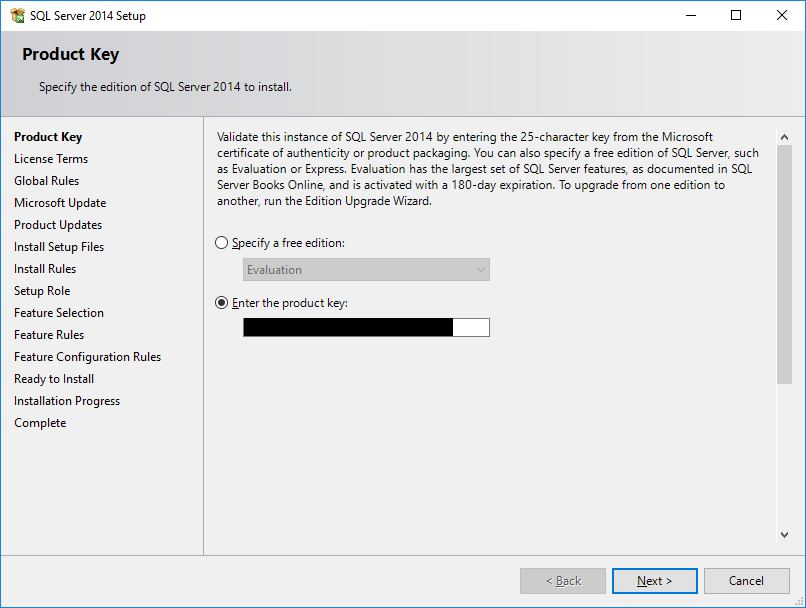
Then, fill the key of your product to not use the trial version
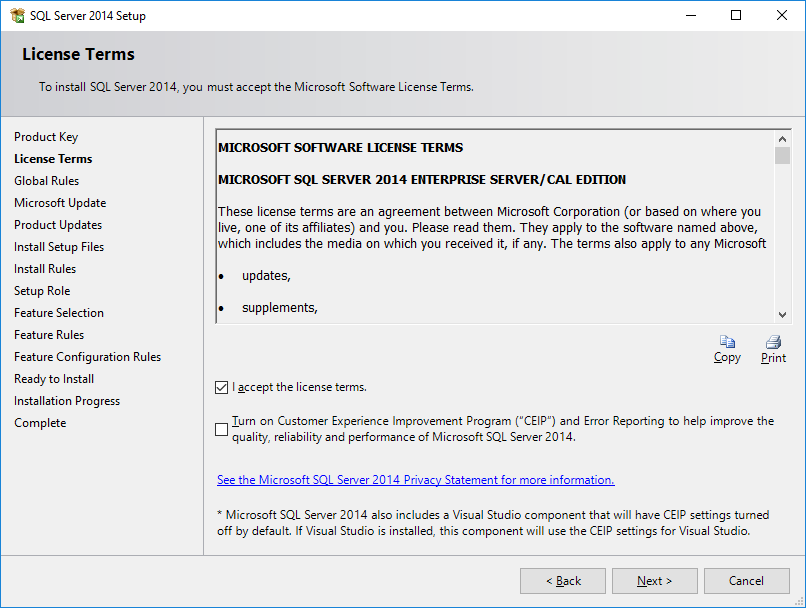
You must accept the terms of the license to continue…
Verification of certain configurations is done before installing SQLServer to identify possible errors. Depending on the type of return, it will be necessary to correct the anomalies before continuing.

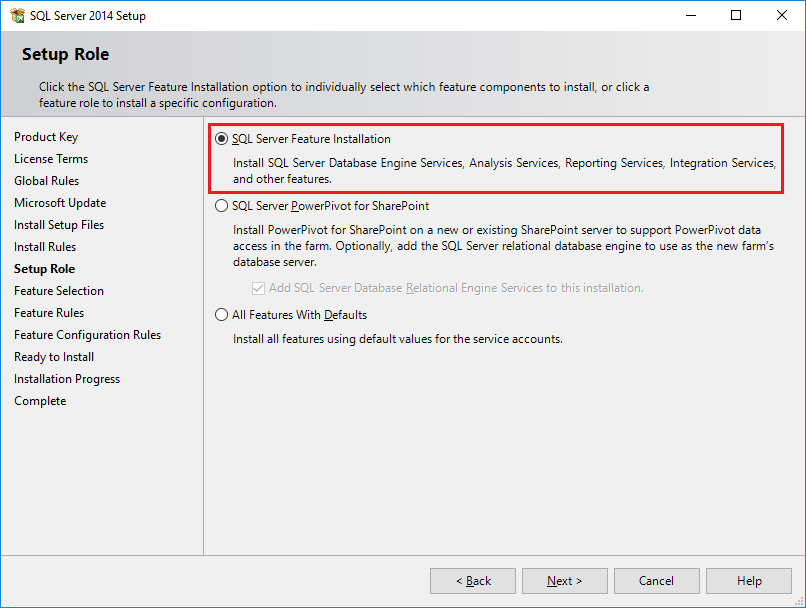
Now, we will start installing features. Choose SQLServer Feature Installation
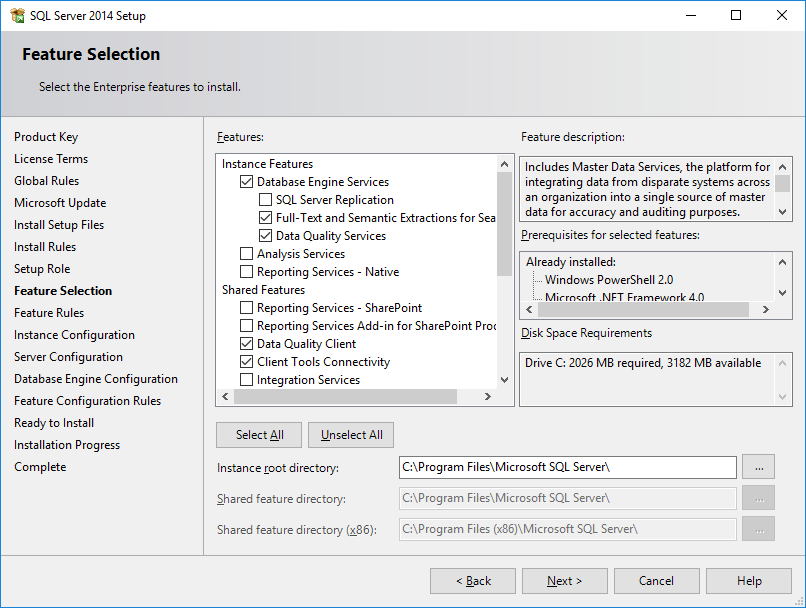
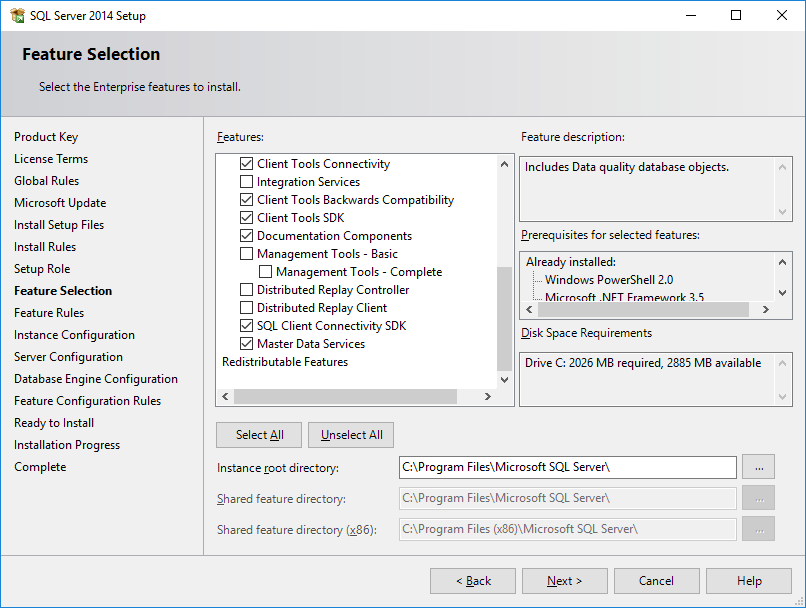
Check the following features:
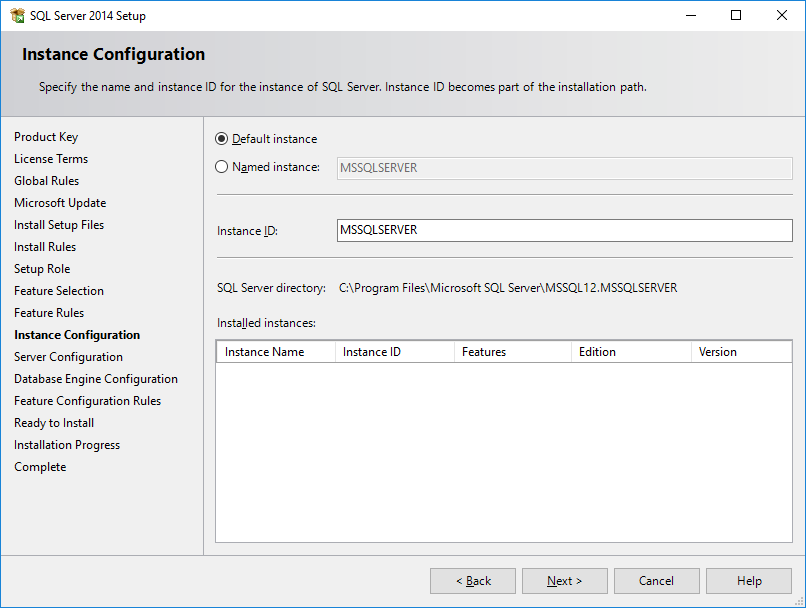
We will use the default instance. Leave Default instance and continue.
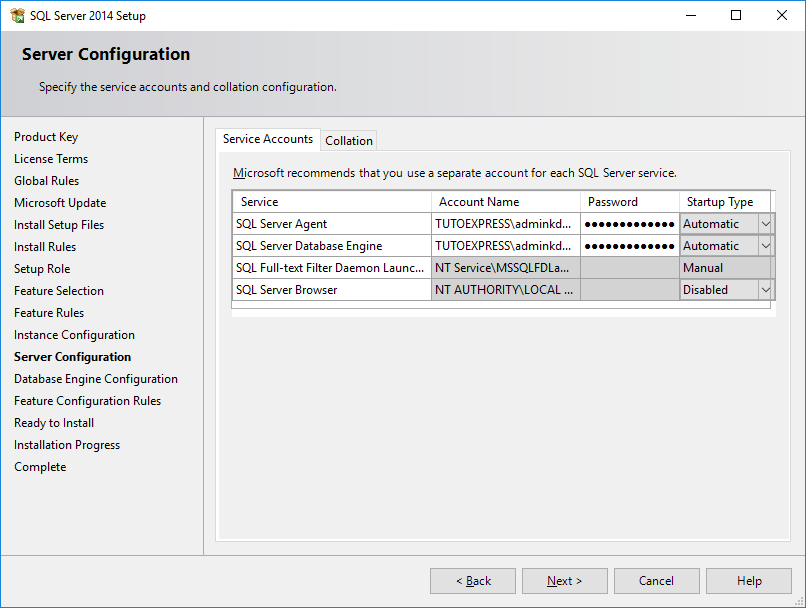
In Service Account, complete the service account for SQL Server Agent & SQL Server Database Engine and its password. In this tutorial, I used a domain administrator account. I advise you to create and use specific accounts for these services and to keep the passwords. Pass both services in Automatic.
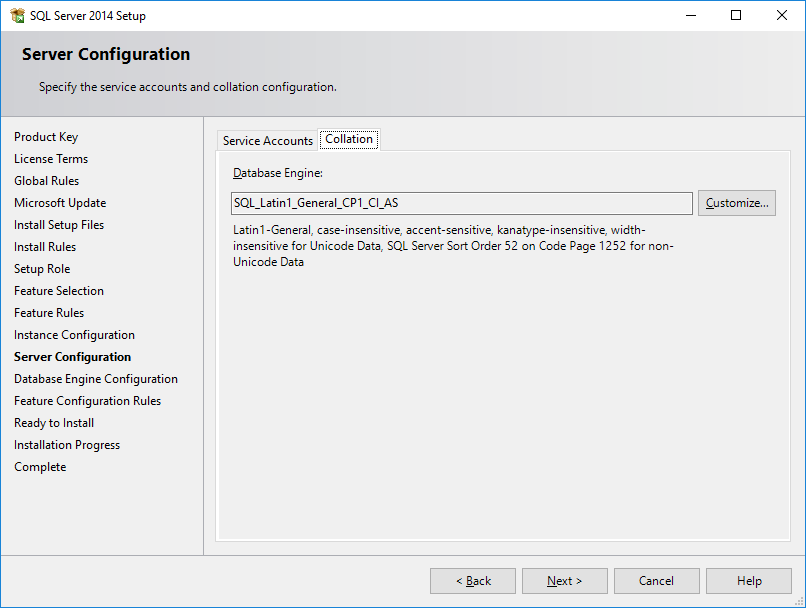
In the Collation tab, you can change the language used according to your needs.
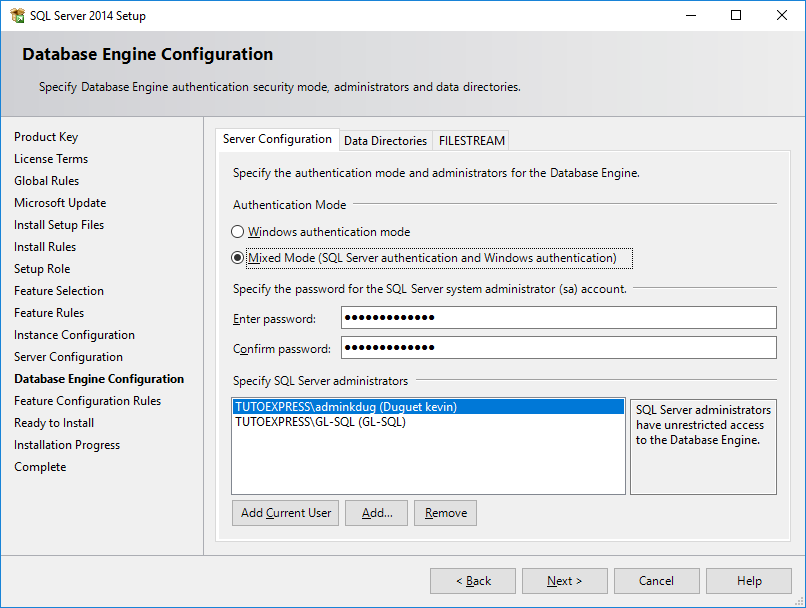
I recommend that you check Mixed Mode (SQL Server authentication and Windows authentication). This will allow you to connect to instance via one or more domain accounts, but also a local account in case of problems.
Then, add a dedicated group to obtain the administrator rights on the SQL server.
In the Data Directories tab, you can change the data paths. By default, everything is on disk C:

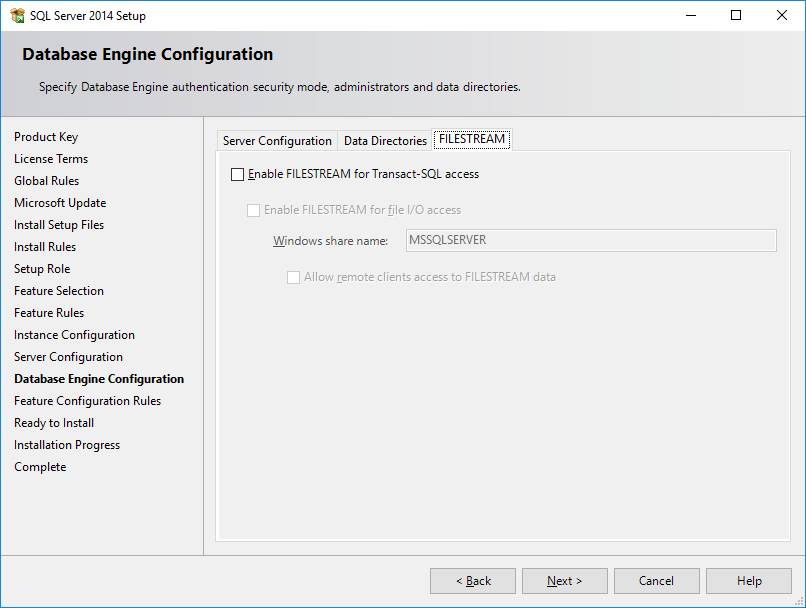
In FILESTREAM, do not check any boxes and continue… More informations here.
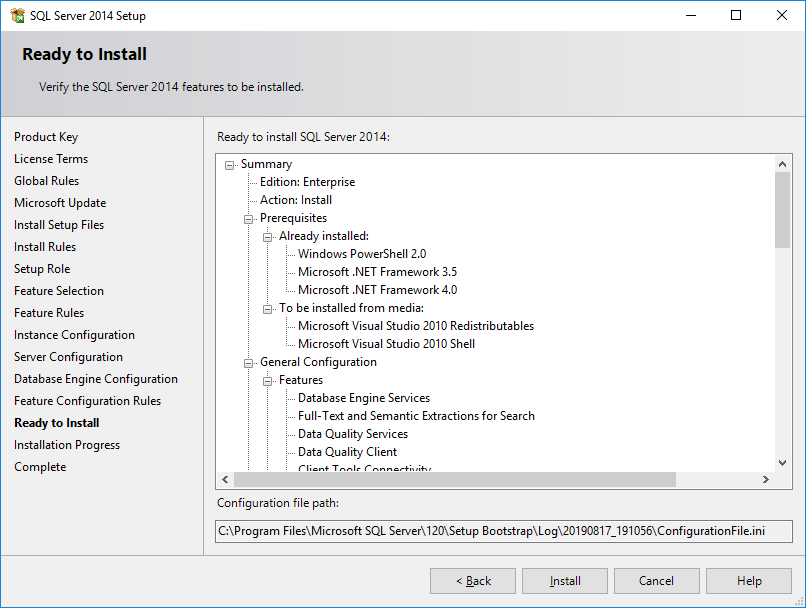
A summary appears. Check the previously configured items and start the installation.
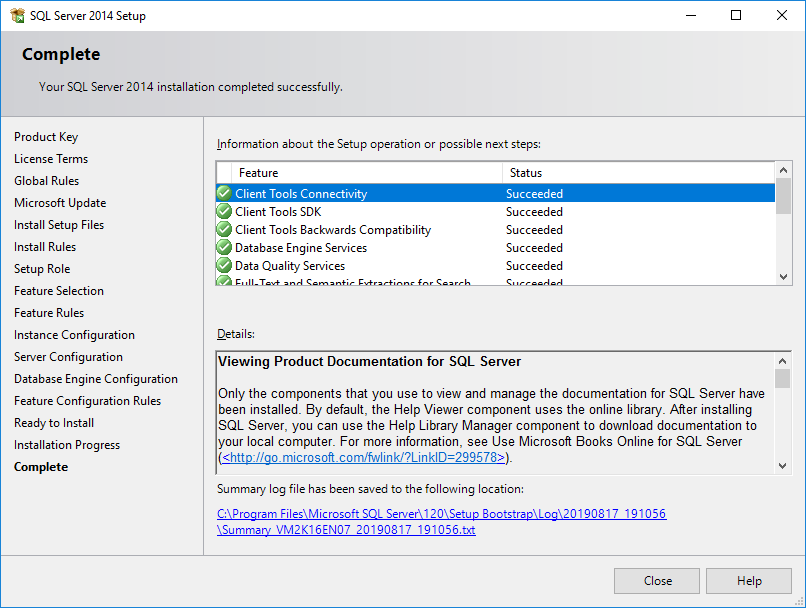
The installation is a success. You can browse all installed features.
Now, you can connect to your SQLServer. To do this, launch SSMS and fill in the name of your SQL machine. Use the appropriate domain account and fill in the previous steps, or a local account. (Tuto : Install SQL Server Management Studio SSMS)
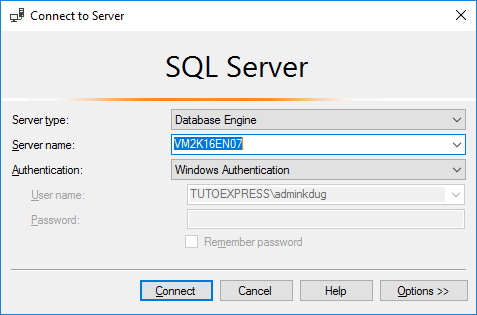
You are well connected to SQL Server…